> ## Documentation Index
> Fetch the complete documentation index at: https://docs.agencyhandy.com/llms.txt
> Use this file to discover all available pages before exploring further.
# Set Up Email to Ticket
> Automatically convert forwarded client emails into support tickets by connecting your support inbox to your AgencyHandy workspace forwarding address.
The **Email to Ticket** feature automatically converts client emails into support tickets. Once your support email is configured to forward incoming emails to your unique AgencyHandy forwarding address, every new email from a recognized client automatically creates a ticket in your workspace.
Only emails sent from existing client email addresses create tickets automatically.
***
## Accessing Email to Ticket
Log in to AgencyHandy. In the left navigation menu, click **Workspace Config**.
Click **Email to Ticket** from the Workspace Config submenu.
From this page, you can:
* Get your unique forwarding address.
* Configure email forwarding.
* Verify your forwarding setup.
* Enable automatic ticket creation.
* View setup instructions for different email providers.
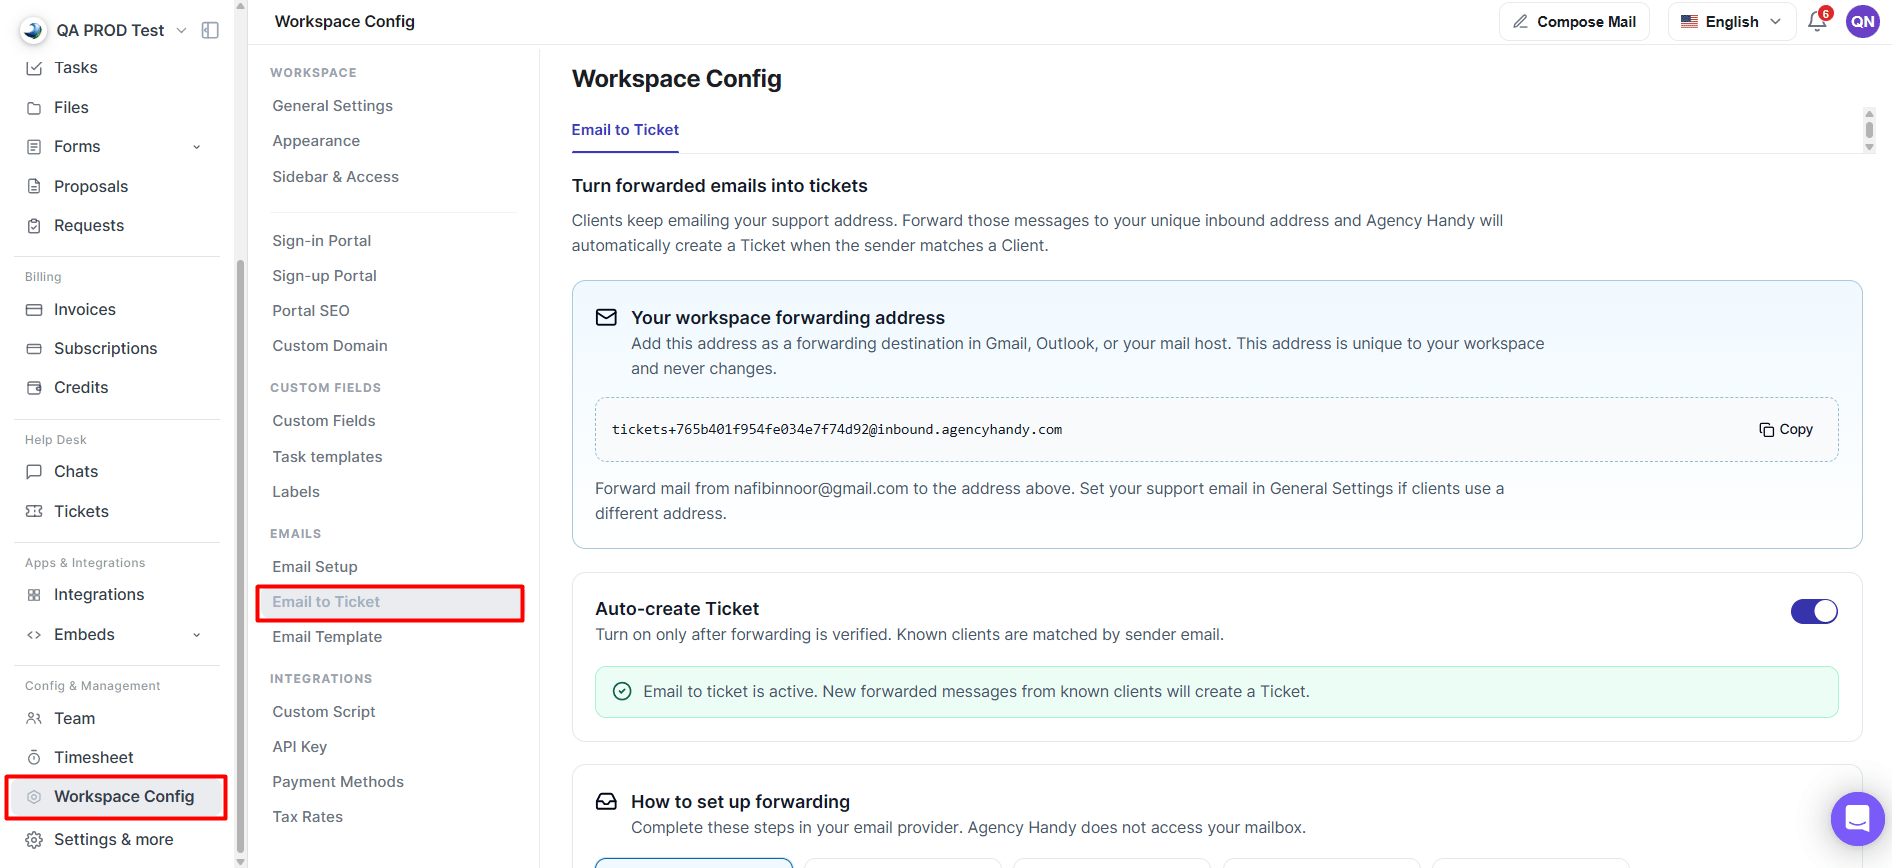
*Email to Ticket settings page*
***
## Your workspace forwarding address
AgencyHandy generates a unique forwarding email address for every workspace. This address receives forwarded emails from your support inbox.
Click **Copy** to copy your workspace forwarding address.
Add this address as a forwarding destination in your email provider.
Complete the forwarding verification process required by your provider.
Once verification is complete, enable **Auto-create Ticket**.
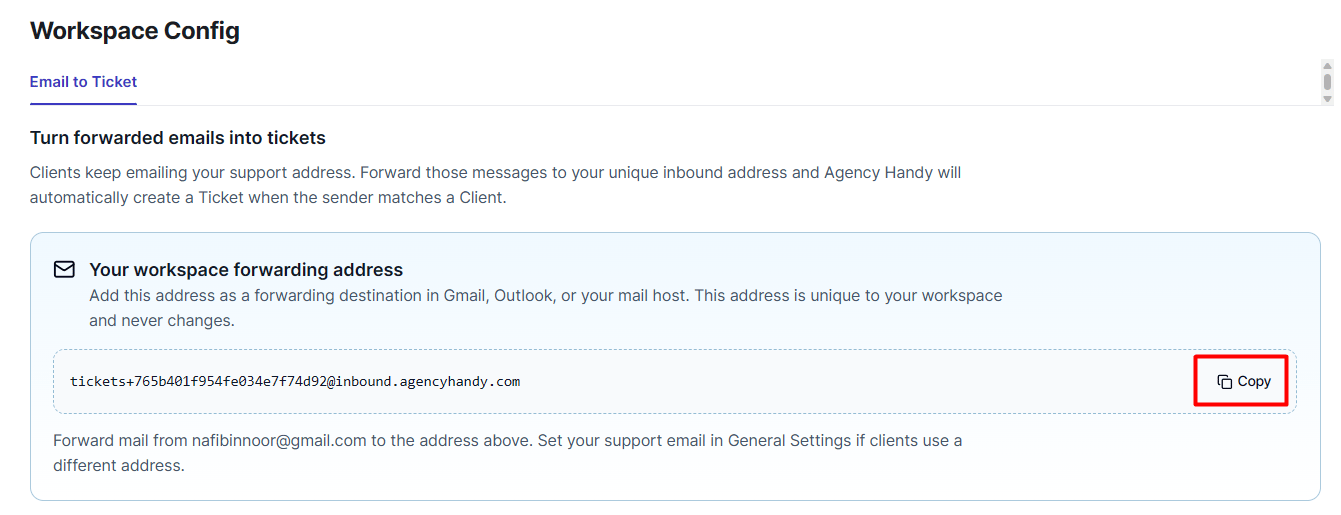
*Workspace forwarding address with Copy button*
Your forwarding address is unique to your workspace and remains the same unless you regenerate it.
***
## Setting up email forwarding
AgencyHandy does not access your mailbox. Email forwarding is configured entirely within your email provider.
The Email to Ticket page includes setup guides for:
* Gmail
* Outlook / Microsoft 365
* Zoho Mail
* cPanel / Hosting
* Other providers that support email forwarding
Select your email provider on the Email to Ticket page to view the appropriate setup instructions.
***
## Gmail setup
If you use Gmail, follow these steps.
In Gmail, go to **Settings → See all settings → Forwarding and POP/IMAP**.
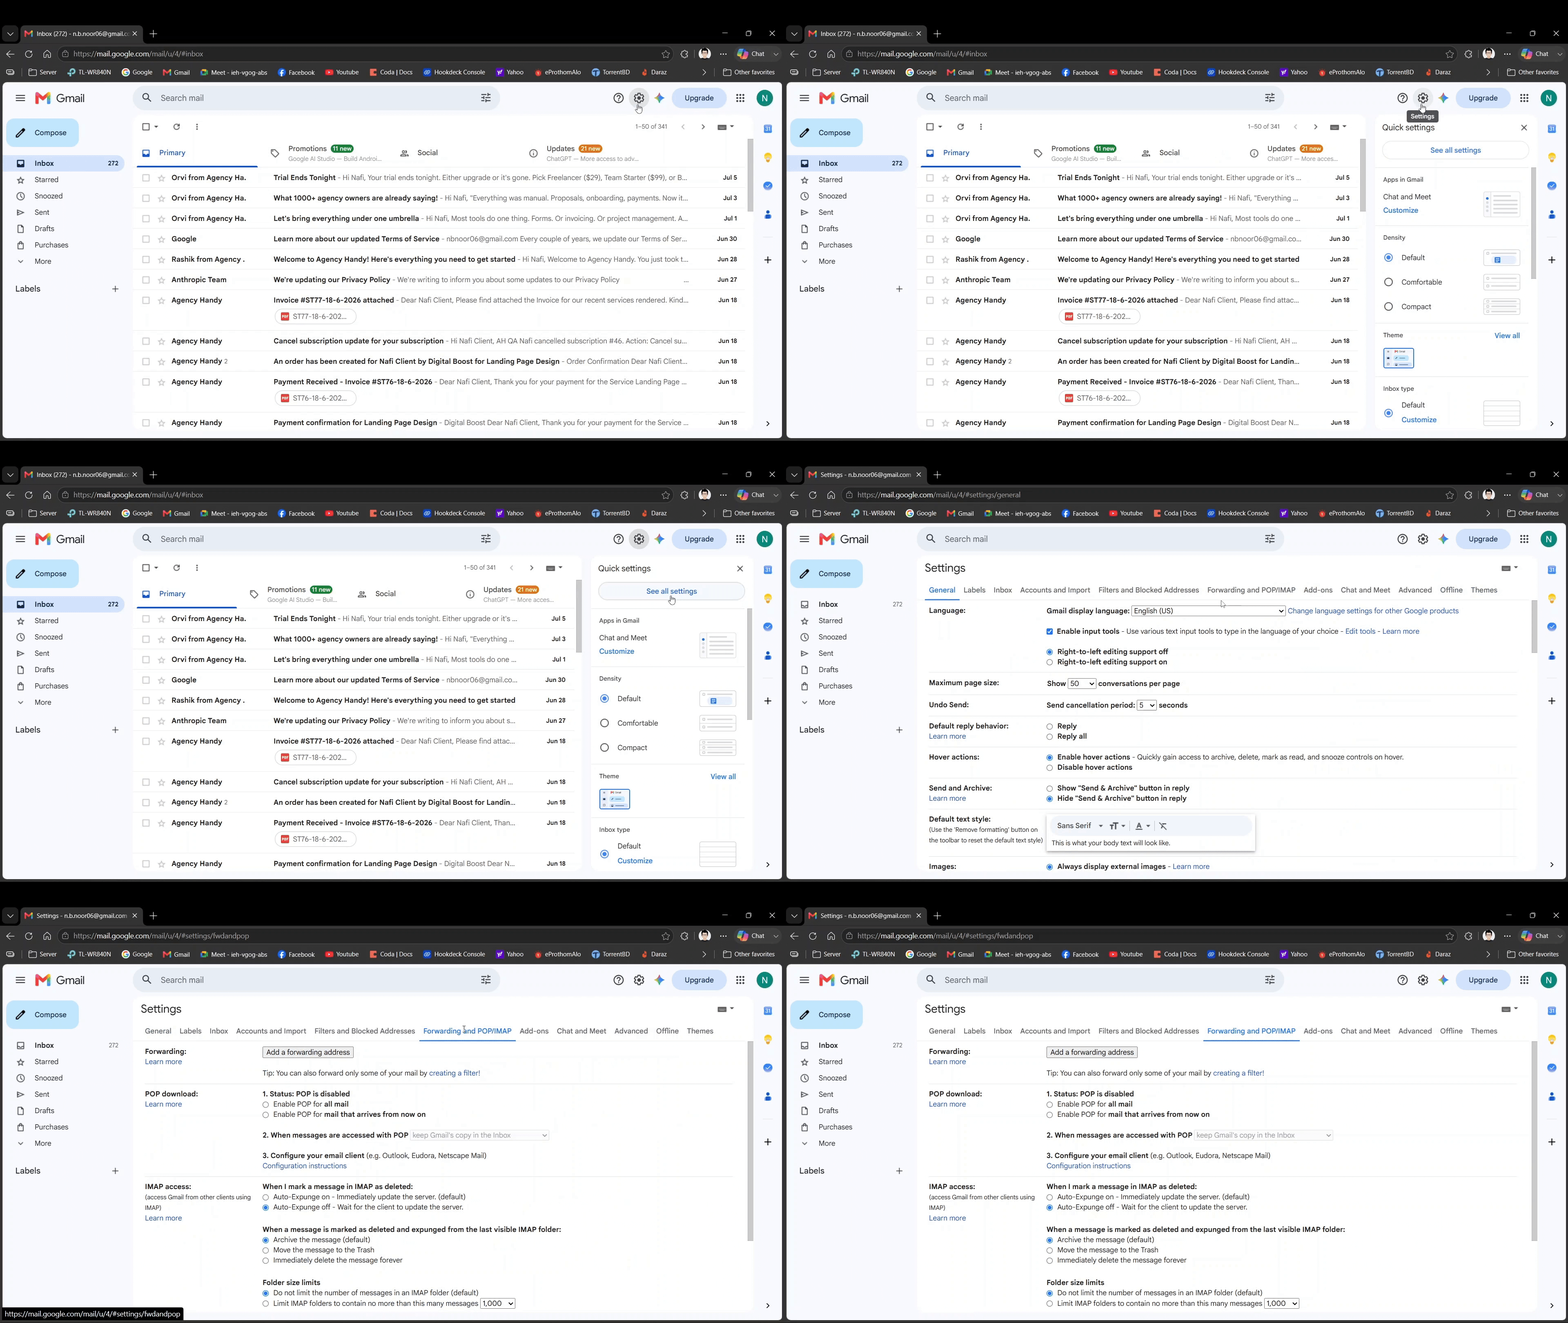
*Gmail Forwarding and POP/IMAP settings tab*
Click **Add a forwarding address** and paste the forwarding address you copied from AgencyHandy. Google sends a confirmation email to verify the forwarding address. Return to AgencyHandy after saving the forwarding address.
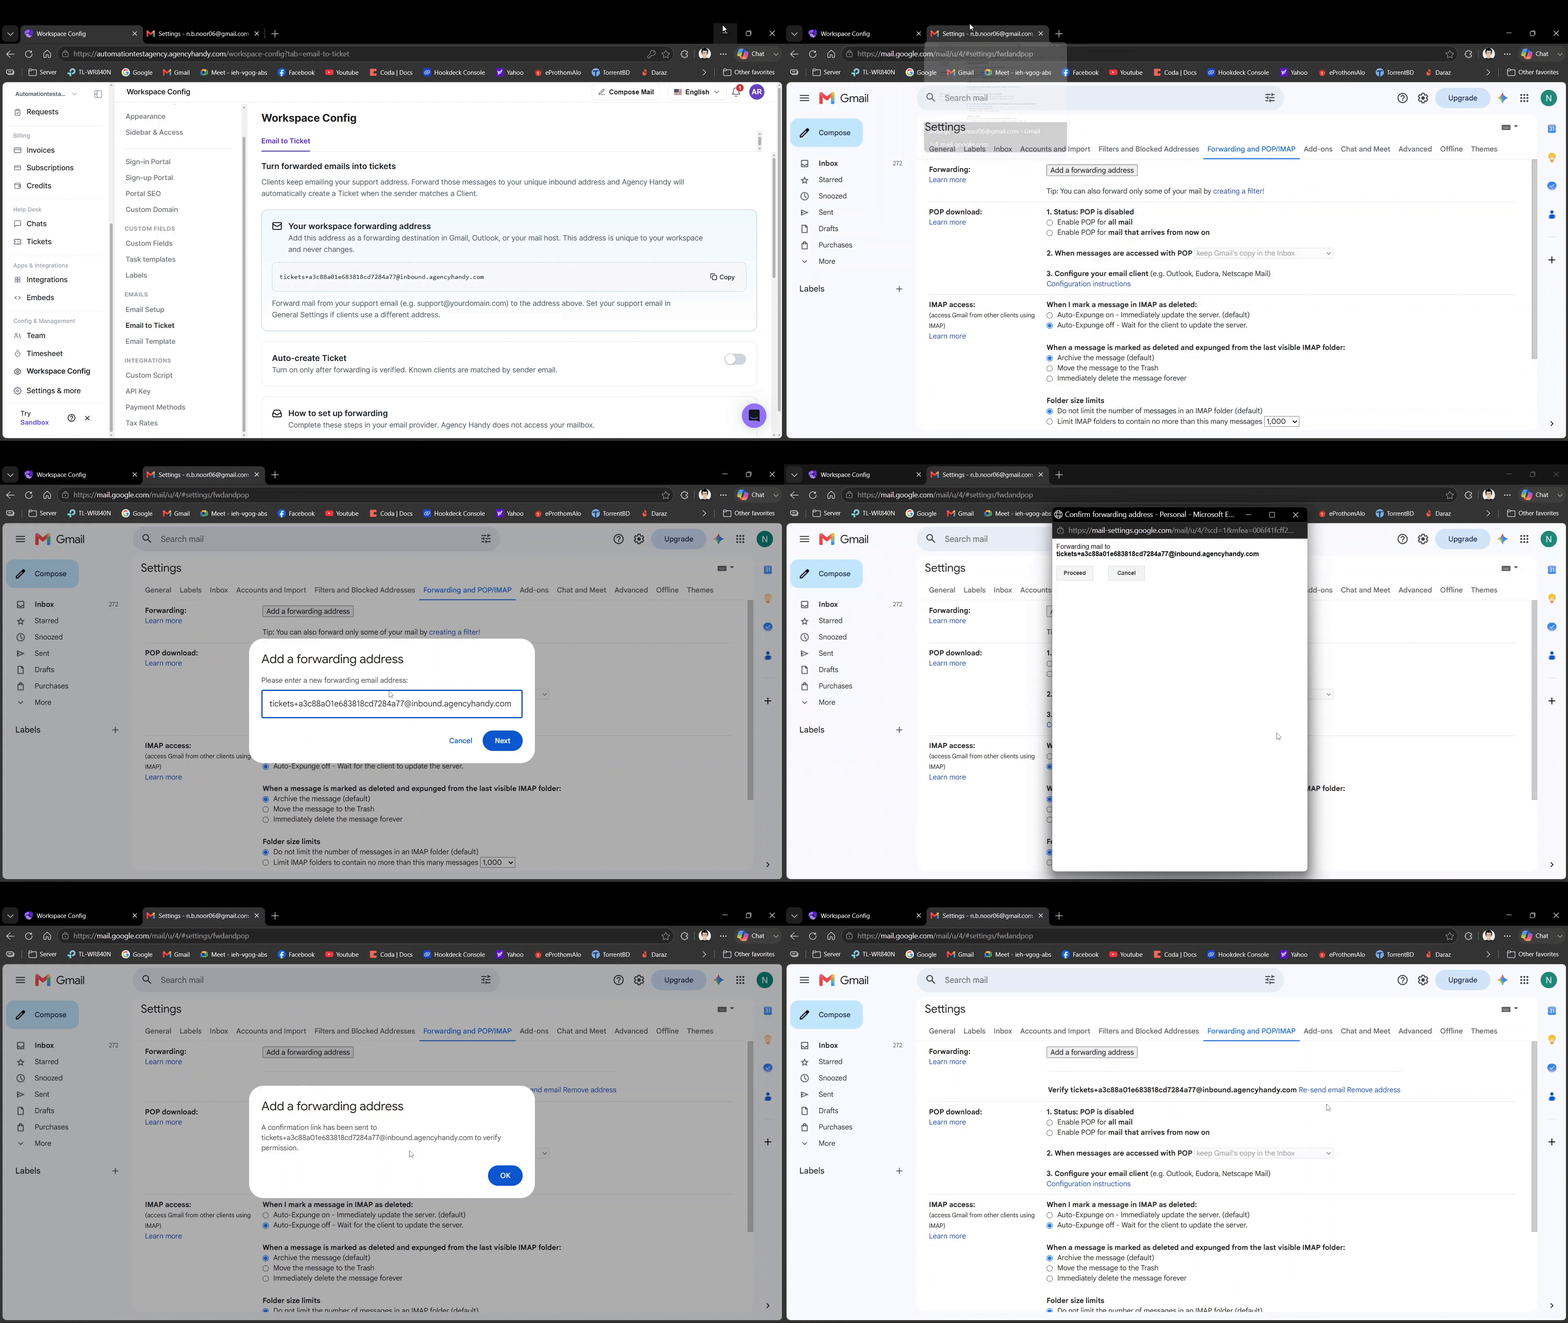
*Gmail Add a forwarding address dialog*
Return to **Workspace Config → Email to Ticket** and click **I've added the address in Gmail**. AgencyHandy waits for Google's confirmation email and automatically detects the confirmation link or verification code when it arrives, usually within one to two minutes. Once verification is complete, the forwarding setup is ready.
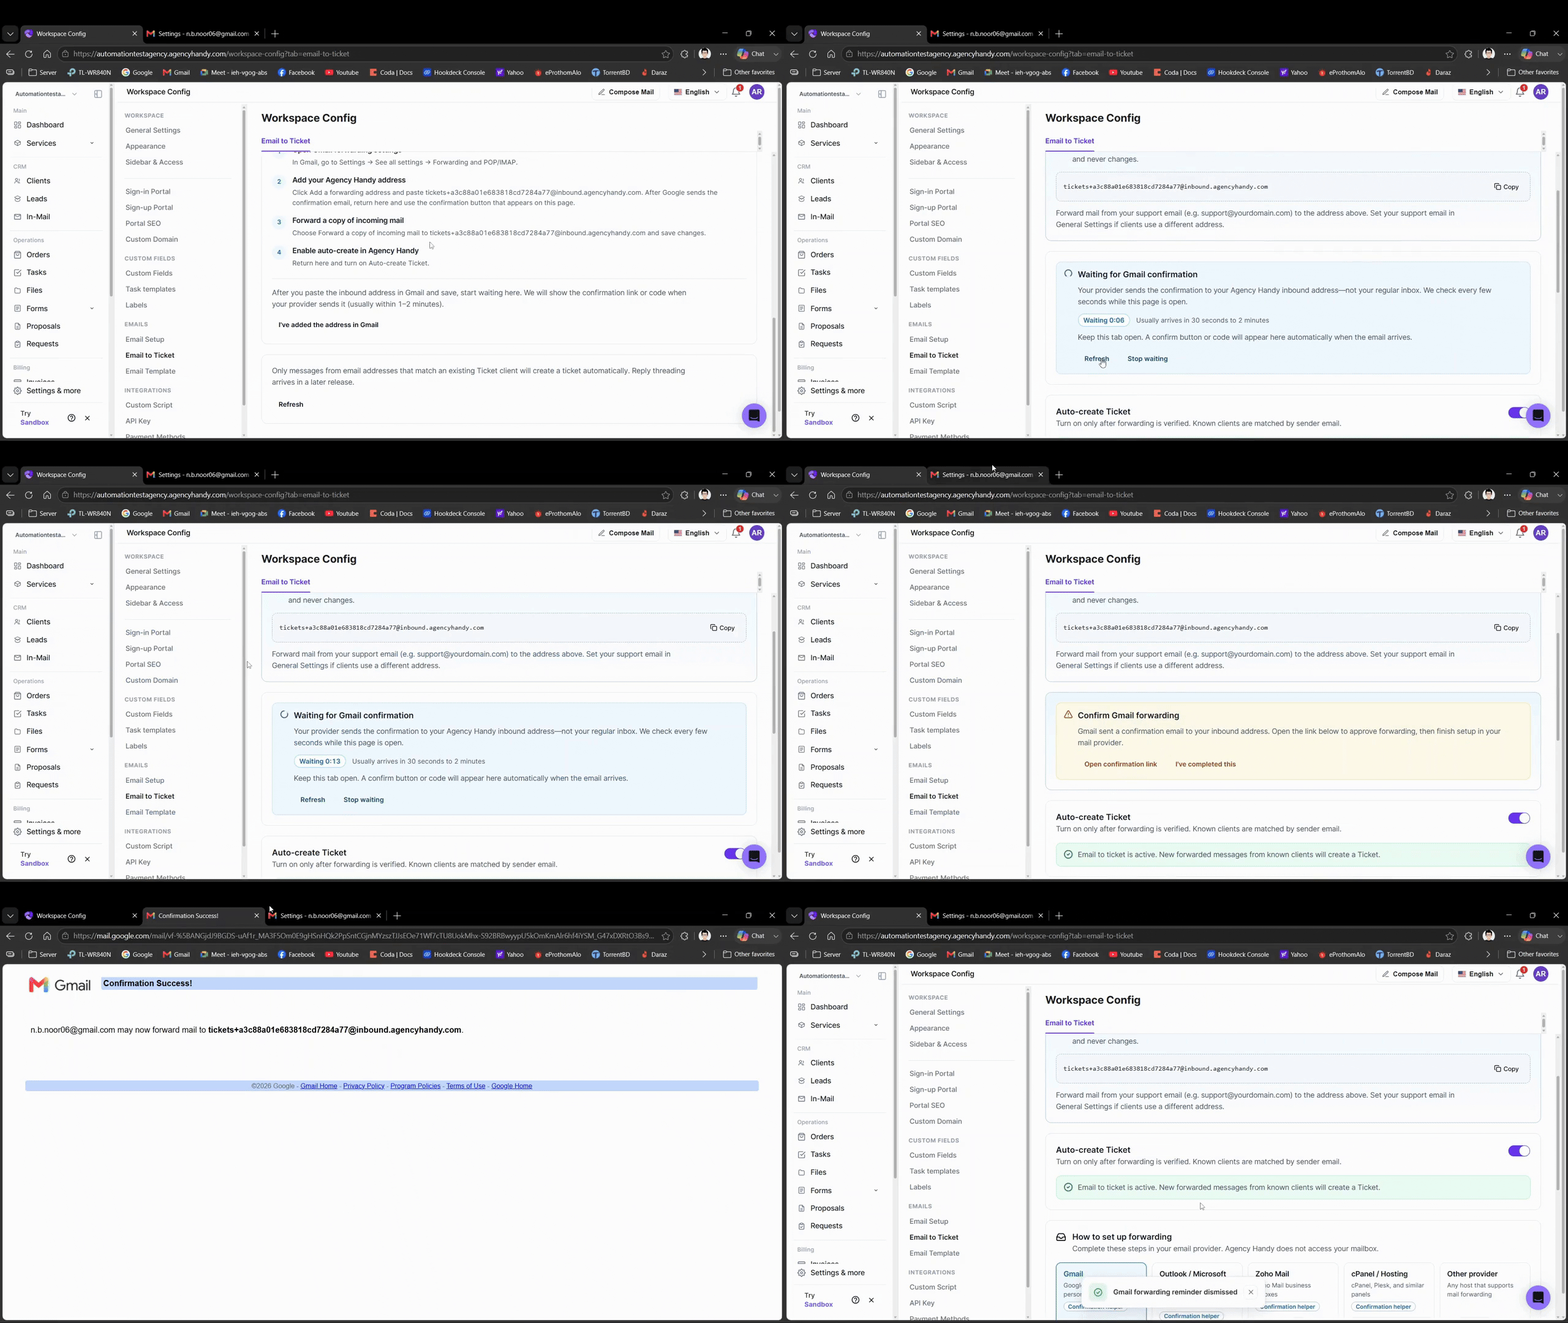
*Verifying the forwarding address in AgencyHandy*
In Gmail:
* Enable **Forward a copy of incoming mail**.
* Select your AgencyHandy forwarding address.
* Save your changes.
All future emails received by your support inbox are now forwarded to AgencyHandy.
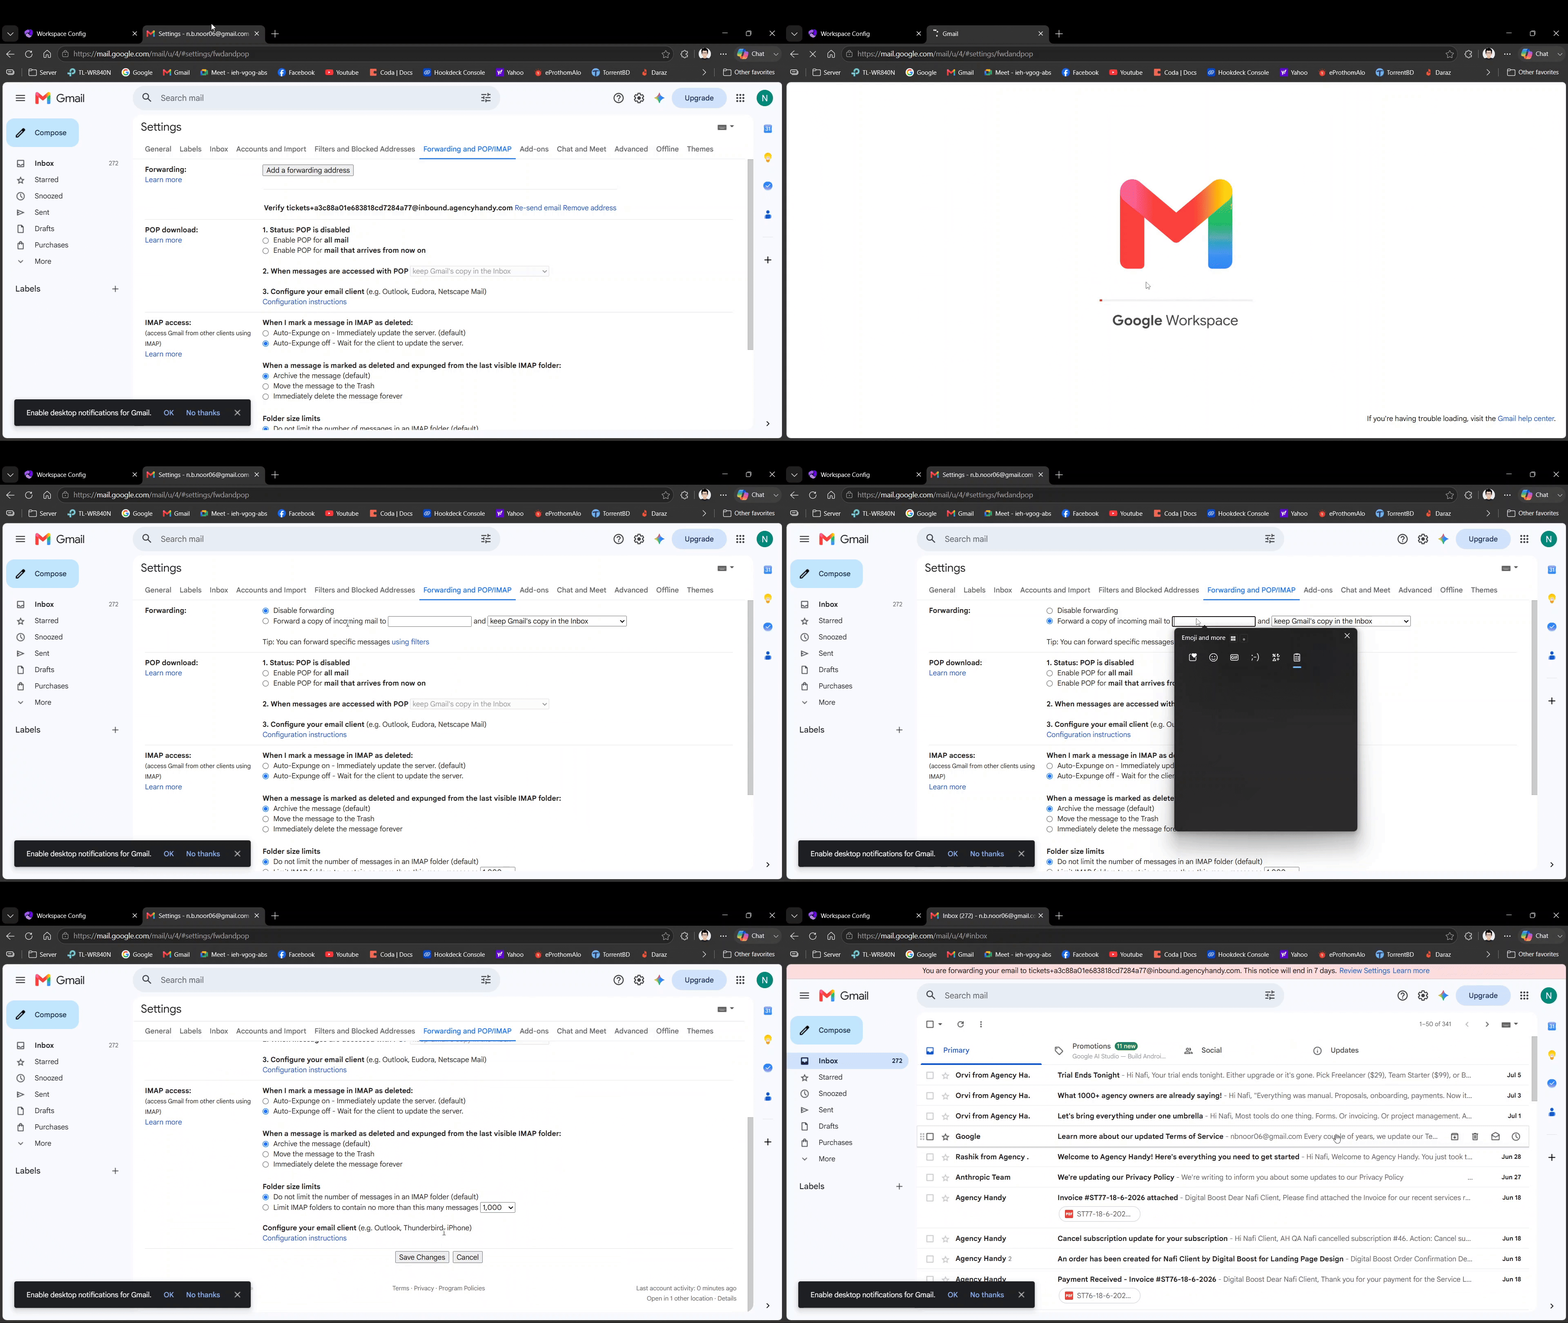
*Gmail Forward a copy of incoming mail option*
***
## Auto-create Ticket
After forwarding has been verified, enable the **Auto-create Ticket** toggle.
When enabled:
* Every forwarded email from an existing client automatically creates a new support ticket.
* Clients are matched using their email address.
* A success message confirms that Email to Ticket is active.

*Auto-create Ticket toggle enabled*
Keep this option disabled until forwarding verification has been completed.
***
## Confirmation helper
For supported email providers, AgencyHandy includes a confirmation helper. After adding the forwarding address in your email provider:
1. Return to the Email to Ticket page.
2. Click the confirmation button, such as **I've added the address in Gmail**.
3. Wait while AgencyHandy checks for the provider's verification email.
4. Once detected, AgencyHandy automatically completes the verification process.
This removes the need to manually retrieve the verification email or confirmation code.
***
## Refresh verification status
If verification is taking longer than expected, click **Refresh** to check for newly received confirmation emails.
***
## How Email to Ticket works
Once Email to Ticket is configured:
1. A client sends an email to your support email address.
2. Your email provider automatically forwards a copy of the email to your AgencyHandy forwarding address.
3. AgencyHandy verifies the sender's email address.
4. If the sender matches an existing client in your workspace, a new ticket is automatically created.
***
## Notes
* Only emails from existing client email addresses create tickets automatically.
* Emails from unknown senders are ignored.
* Each workspace has its own unique forwarding address.
* AgencyHandy only receives forwarded copies of emails. It does not access your mailbox directly.
* Email reply threading is planned for a future release.